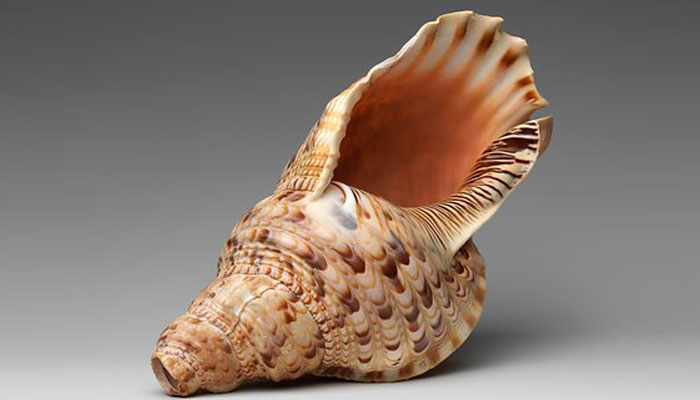
Do you want to know how to clean a conch shell?
Discovering a pristine conch shell during a leisurely stroll along the beach is a captivating experience. However, unlocking the true beauty of your find requires a delicate cleaning and polishing process.
This comprehensive guide will walk you through the steps, providing insights into different cleaning methods, polishing techniques, and expert tips.
Understanding Conch Shells
Before delving into the cleaning process, let’s deepen our understanding of the unique characteristics of conch shells. These shells come in various types, including the Queen Conch and Fighting Conch, each possessing distinct features. Identifying these variations will allow for a more tailored cleaning approach, addressing specific challenges unique to each type.
How to Clean a Conch Shell: The Step-by-Step Guide
1, Use a Stiff Brush:
Start your conch shell cleaning journey by employing a stiff brush. This initial step is crucial for removing any dirt, sand, or debris clinging to the exterior of the shell. For those hard-to-reach nooks and crannies, a toothbrush can be a handy tool, ensuring a thorough cleaning process.
2. Soak in Bleach:
Next, immerse the conch shell in a carefully measured bleach solution for about 30 minutes. It’s crucial to use a recommended concentration of bleach to ensure effectiveness while being mindful of safety and environmental impact. This step goes beyond mere cleaning; it helps eliminate any bacteria or organisms residing inside the shell, contributing to its long-term preservation.
3. Rinse and Dry:
Thoroughly rinse the shell with clean water after the bleach soak, ensuring no residual bleach remains. Pat it dry with a paper towel, delicately handling the shell to prevent any damage. Optionally, apply a coat of sealant or wax to protect the shell from potential scratches or dirt, adding a layer of preservation to your cleaned conch.
Alternative Cleaning Methods:
Soaking without Bleach:
- Submerge the conch shells in clean water for 5–6 days, refreshing the water daily. This method is a slower yet effective way of cleaning, allowing time for natural processes to take place.
- Boil the shells in a large pan of water to eliminate any remaining germs. This step is crucial for those who seek an alternative to bleach but still want to ensure the removal of potentially harmful microorganisms.
- Allow the shells to fully dry, then remove any remaining debris and barnacles using a piece of sandpaper. This hands-on approach ensures that the shell is not only clean but also smooth and aesthetically pleasing.
- Optionally, spray a thick layer of toothpaste over the shells and let them rest for a few hours. This alternative cleaning agent adds a touch of creativity to the process, offering a different solution for conch shell enthusiasts.
How to Polish a Conch Shell
Now that your conch shells are clean, you might want to enhance their natural beauty through polishing. Explore various methods for achieving a polished and shiny finish, each bringing out the unique features of your conch shell:
1. Toothpaste and Toothbrush:
Gently polish the surface of the shell using toothpaste and a toothbrush. This method not only adds a gleaming shine but also helps remove any remaining stains, restoring the shell to its natural vibrancy.
2. Sealant, Wax, or Olive Oil:
Apply a thin layer of sealant, wax, or dip the shell in olive oil, adding a protective and enhancing layer to the cleaned shell. Afterward, polish the shell with a soft cloth, allowing the natural luster to shine through.
3. Carnauba Wax or Buffing Kit:
Experiment with carnauba wax or use a polishing kit specifically designed for conch shells. Alternatively, use a buffing pad to achieve a glossy finish. This step adds a professional touch, taking your conch shell from clean to museum-worthy.
Advanced Tips:
1.Grit Removal:
In addition to soaking or boiling, exposing the shells to direct sunlight for 2-3 weeks can naturally flake off the grit layer, revealing a cleaner surface. This method taps into the power of nature, providing an alternative to traditional cleaning approaches.
2. Understanding Changes in Hue:
Note that polishing may alter the shell’s original hue. Embrace these changes as part of the natural cleaning process, acknowledging that each conch shell’s uniqueness extends to its evolving appearance.
Conclusion: How to Clean a Conch Shell
Armed with this comprehensive guide, you can now fully appreciate the beauty of your beach find. However, if uncertainties arise or your shells require professional attention, don’t hesitate to consult an expert for guidance.
If you’re ever in doubt about how to clean a conch shell, or if the shell is too dirty to clean on your own, consult a professional. They will be able to help you get your conch shells looking their best.
Meanwhile, you can also check out 21 Metal Bands With Female Singers That You Need to Know.
Frequently Ask Questions
How do I clean the conch at home?
Utilize a stiff brush, carefully measured bleach, clean water, toothpaste, sealant or wax, olive oil, carnauba wax, or a buffing pad for cleaning and polishing.
What can I use to clean a conch shell?
Opt for a combination of cleaning tools and materials, such as brushes, carefully measured bleach, clean water, toothpaste, and various polishing agents.
How do I get the grit off my conch shells?
Explore soaking, boiling, sunlight exposure, or polishing methods to effectively remove grit, tailoring your approach based on the unique characteristics of your conch shells.
How do I polish my conch shells?
Choose from multiple polishing methods, ensuring proper ventilation and eye protection. Experiment with different techniques to find the one that best enhances the natural beauty of your conch shells.
You can also check out How Much Does It Cost to Restring a Guitar (2022 Exclusive) and 80s Female Pop Singers.


