Making a flute is a fun and rewarding project that can be completed with a few simple tools and supplies.
In this step-by-step guide, we will show you how to make a flute from scratch. You will need some basic woodworking skills, but anyone can do this! We will walk you through the entire process, from selecting materials to finishing the flute.
So gather your supplies and let’s get started!
How to Make a Flute From Scratch (Step By Step)
Step 1: Select the Materials
You will need a piece of wood at least 24″ long and ¾” thick, a drill bit slightly smaller than the diameter of your pipe, a saw blade that can cut through this piece of wood, and some sandpaper.
You’ll also want to make sure you have plenty of time on hand because making a flute from scratch takes about an hour or two depending on how fast you work with tools like saws, drills, etc…
Step 2: Cut Out the Pieces
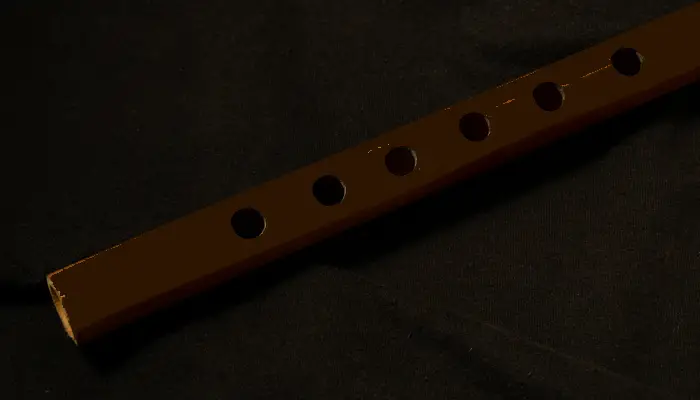
Using a saw, cut the piece of wood into two pieces – one that is 11″ long and one that is 13″ long.
Drill a hole in the center of the shorter piece (11″) that is about ½” deep. This will be your pipe’s mouthpiece.
Saw off one end of the longer piece (13″) so that it is flat and square. This will be your pipe’s body.
Drill a hole in the center of this piece about ¾” deep – just enough for two fingers to fit inside comfortably without touching each other when playing music on it!
Step 3: Attach the Pieces Together
Use wood glue to attach the pieces of wood together.
Start by gluing one end of your pipe to its body and then glue the other end so that it is flush with each side. Let dry overnight before playing!
Step 4: Sandpaper It Smoothly
Use sandpaper on all edges until they are smooth enough for you to comfortably play music through them without hurting yourself or others around you while doing so.
Step 5: Add a Mouthpiece Cover
You can also add a mouthpiece cover to your flute if desired – this is how some people like their pipes best! This step is optional but can make the sound quality better and more consistent over time as well as protect against debris getting into it during use.
Step 6: Finish It Off With a Coat of Paint or Wood Stain (optional)
You can finish off your flute with paint or wood stain if desired, but this step is optional and not necessary for making music on it!
The best thing about how to make these pipes from scratch using only materials that you probably already have lying around is how easy it is!
Meanwhile, you can also check out How Many Keys Does a Flute Have and Why Is a Flute a Woodwind.
Conclusion: How to Make a Flute
You don’t have to be an expert woodworker either; anyone can do this project as long as they have some basic tools and supplies on hand. The flutes sound great too so if you’ve never tried making one before then now might just be your chance!
If there’s anything else we missed or you have any questions about how to make a flute from scratch, feel free to leave us a comment below and we’ll get back to you.
You can also check out What Is the Best Brand of Flute? and Is Flute the Hardest Instrument to Play.